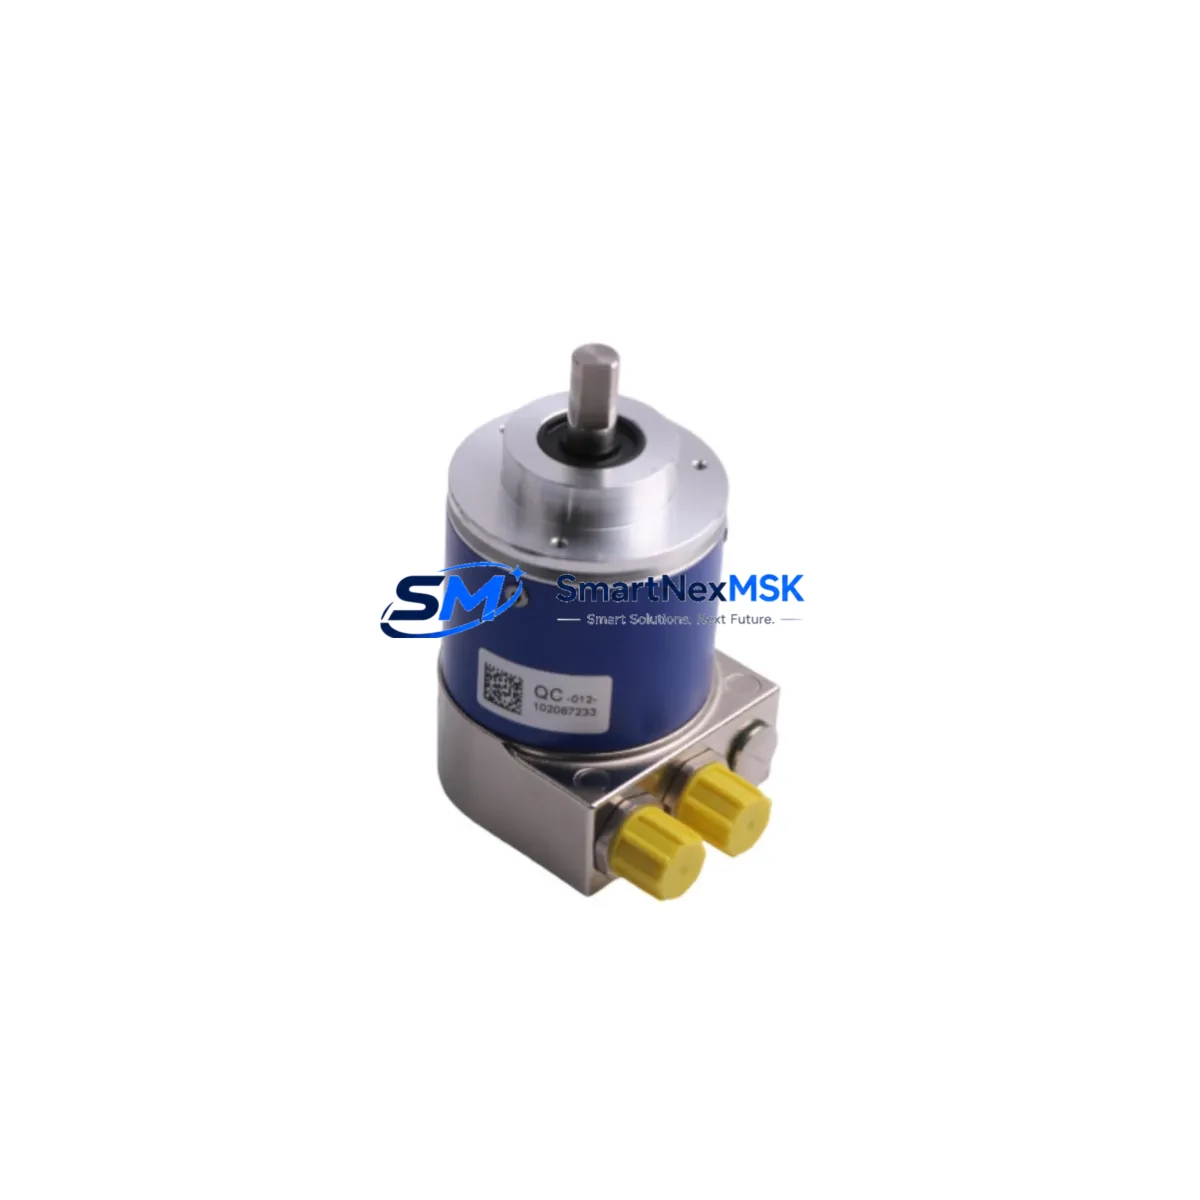
BAUMER GXMMW.A202PA2 Retrofit-Ready Absolute Encoder Interface for GXMMW Series Control Systems
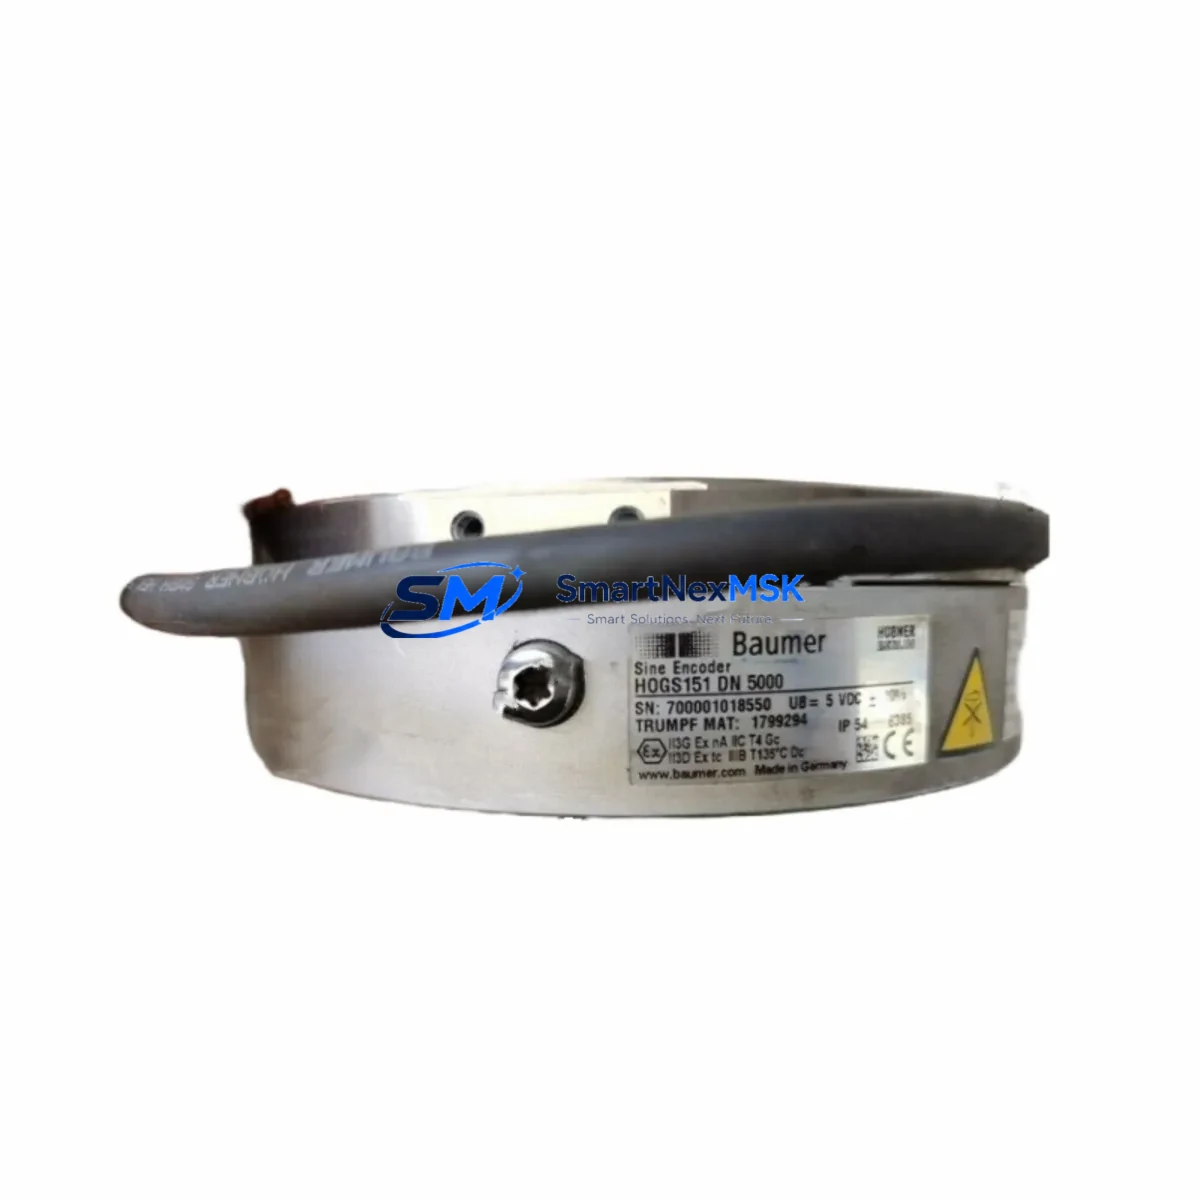
The BAUMER GXMMW.A202PA2 is a precision absolute encoder interface module engineered for seamless integration into GXMMW Series control architectures. Designed with retrofit compatibility as a core specification, this module addresses the growing demand for reliable drop-in replacements in aging automation systems where the original GXMMW.A202PA2 has reached end-of-life or is no longer available through standard distribution channels. Whether you are managing a planned upgrade cycle or responding to an unplanned component failure, the GXMMW.A202PA2 provides a verified, tested path back to full system operation with minimal engineering rework.
Industrial facilities running legacy GXMMW Series encoder feedback loops frequently encounter challenges when sourcing direct replacements. The BAUMER GXMMW.A202PA2 available through SMARTNEXMSK is sourced from verified supply channels, pre-tested prior to shipment, and backed by a 12-month warranty — giving maintenance engineers and procurement teams the confidence to proceed with replacement without extended lead times or costly system redesigns.
Upgrade Compatibility Table
| Parameter | BAUMER GXMMW.A202PA2 | Retrofit Notes |
|---|---|---|
| Interface Protocol | SSI / BiSS-C | Verify master controller supports SSI clock frequency; no firmware change typically required for same-series controllers |
| Supply Voltage | 10–30 V DC | Confirm existing power supply rail capacity; check against total module load on the same 24 V bus |
| Resolution | Up to 25-bit multiturn | Match resolution parameter in PLC program; update encoder configuration block if resolution differs from legacy unit |
| Connector / Terminal | M12 / Terminal block (model-dependent) | Verify pinout against existing cable harness; adapter cables may be required for older M8 wiring |
| Mounting | DIN rail / flange mount | Standard DIN 35 mm rail compatible; no panel modification required in most GXMMW Series cabinets |
| Communication Compatibility | SSI, BiSS-C, RS-422 | Compatible with BAUMER GXMMW Series masters; verify cable shielding and termination resistance for long-run installations |
| Replacement Recommendation | Direct drop-in for GXMMW.A202PA2 variants | Cross-reference encoder body model and shaft dimensions before ordering; confirm feedback cable length |
| Commissioning Focus | Zero-point calibration, preset value | Re-establish encoder zero reference after installation; update HMI position display scaling if applicable |
| Warranty | 12-Month Warranty — covered against manufacturing defects; includes pre-shipment functional test report | |
Retrofit Planning for Existing Automation Systems
Replacing the BAUMER GXMMW.A202PA2 in an active production environment requires a structured approach that accounts for the full scope of the encoder feedback chain. In most GXMMW Series installations, the encoder interface module operates in conjunction with a BAUMER GXMMW Series master evaluation unit, which processes the SSI or BiSS-C data stream and forwards position values to the host PLC — commonly a Siemens S7-300, S7-400, or equivalent mid-range controller via PROFIBUS DP or PROFINET IO. Before initiating the swap, engineers should document the current encoder preset value, the zero-point offset stored in the PLC data block, and any scaling factors applied in the HMI tag configuration.
Power supply verification is a critical pre-replacement step. The GXMMW.A202PA2 draws from the 24 V DC bus shared with other field devices in the control cabinet. If the existing SITOP PSU8200 or equivalent power supply is already operating near rated capacity, adding a replacement module without auditing the total current draw can cause voltage sag and intermittent faults across the entire I/O network. Use a clamp meter to measure actual bus current before and after module installation.
Terminal wiring should be mapped against the original BAUMER GXMMW.A202PA2 datasheet. In older installations, the encoder cable may terminate on a Phoenix Contact MSTB or Weidmüller KLIPPON terminal block rather than a direct M12 connector. Confirm wire color coding, shielding continuity, and termination resistance — particularly for SSI clock and data lines running more than 10 meters. Improper shielding on long cable runs is a common source of position jitter after module replacement.
For systems where the GXMMW.A202PA2 feeds position data into a motion controller or servo drive — such as a BAUMER HMG or a third-party drive using RS-422 differential input — verify that the new module’s output signal levels and timing characteristics are within the drive’s input specification. In some retrofit scenarios, a BAUMER GSD or equivalent signal conditioner may be inserted between the encoder output and the drive input to buffer the signal and prevent ground loop interference.
If the control system includes an HMI panel — whether a Siemens TP700 Comfort, a Weintek MT8000 series, or a legacy operator panel — the position display tag linked to the encoder feedback register must be verified after replacement. Zero-point drift or a changed preset value will cause the HMI to display incorrect position data even if the PLC program is otherwise functioning correctly. Update the HMI project and re-download if scaling parameters have changed.
In multi-axis systems, the GXMMW.A202PA2 may be one of several encoder interface modules mounted on a shared backplane or DIN rail section alongside other BAUMER GXMMW variants handling different axes. Confirm module addressing and channel assignment in the PLC hardware configuration before going online. Incorrect slot addressing is a frequent commissioning error that causes the controller to read position data from the wrong axis.
Downtime Control During System Migration
Minimizing production downtime during a GXMMW.A202PA2 replacement requires preparation that begins well before the maintenance window. The most effective strategy is to pre-configure the replacement module offline — setting the preset value, verifying the SSI clock frequency, and confirming the output signal format — so that the physical swap can be completed within a single planned shutdown period rather than requiring multiple intervention cycles.
Before powering down the system, export a full backup of the PLC program from the Siemens TIA Portal or STEP 7 project, including all data blocks that store encoder offset values and axis reference positions. This backup serves as the recovery baseline if the replacement module behaves unexpectedly during initial commissioning. Similarly, export the HMI project from WinCC or the equivalent HMI engineering tool so that tag configurations can be restored without re-engineering from scratch.
During the physical replacement, label all terminal connections before disconnecting the encoder cable. Photograph the wiring layout and note the shield grounding point. Reconnect in reverse order, verify terminal torque, and confirm cable shield continuity with a multimeter before applying power. After power-up, monitor the SSI data stream using the PLC diagnostic buffer or an inline SSI analyzer to confirm that position data is being received correctly before releasing the axis for production use.
For critical continuous-process applications where even a brief interruption is unacceptable, consider maintaining a pre-tested GXMMW.A202PA2 spare unit in the control room — pre-configured and ready for immediate swap. SMARTNEXMSK maintains stock of the GXMMW.A202PA2 with pre-shipment functional testing, supporting rapid deployment for emergency replacement scenarios. All units ship with a test report and are covered by a 12-month warranty from the date of delivery.
Retrofit Support FAQ
Q1: Is the BAUMER GXMMW.A202PA2 a direct replacement for the original discontinued unit?
Yes. The GXMMW.A202PA2 supplied by SMARTNEXMSK is sourced to match the original BAUMER specification. It is intended as a direct drop-in replacement for the same SKU in GXMMW Series installations. Minor hardware revision differences may exist; confirm the datasheet revision against your existing installation documentation before ordering if your application has strict revision-control requirements.
Q2: What commissioning steps are required after installing the replacement module?
After physical installation and wiring verification, re-establish the encoder zero-point reference using the preset function. Confirm the SSI clock frequency and data word length match the master controller configuration. Verify position readback in the PLC diagnostic view before enabling axis motion. Update HMI position display tags if scaling or offset values have changed from the previous unit.
Q3: How do I verify wiring compatibility between the GXMMW.A202PA2 and my existing cable harness?
Compare the terminal pinout of the replacement module against the original BAUMER GXMMW.A202PA2 wiring diagram. Pay particular attention to the SSI clock+/clock− and data+/data− differential pairs, the supply voltage terminals, and the shield connection point. If your installation uses an M12 connector, verify the pin assignment against the A-coded or B-coded standard used in your original harness. Contact SMARTNEXMSK technical support with your existing wiring diagram for pre-installation verification assistance.
Q4: What does the 12-month warranty cover, and is a pre-shipment test report included?
The 12-month warranty covers manufacturing defects and functional failures under normal operating conditions as specified in the BAUMER GXMMW.A202PA2 datasheet. Each unit undergoes a pre-shipment functional test prior to dispatch, and a test report is included with the shipment. Warranty claims are processed through SMARTNEXMSK; units must be returned in original packaging with the test report reference number. Warranty does not cover damage resulting from incorrect installation, overvoltage, or mechanical impact.
© 2026 SMARTNEXMSK. All rights reserved.
Original Source: https://smartnexmsk.com
Contact: sales@smartnexmsk.com | +86 18259474341