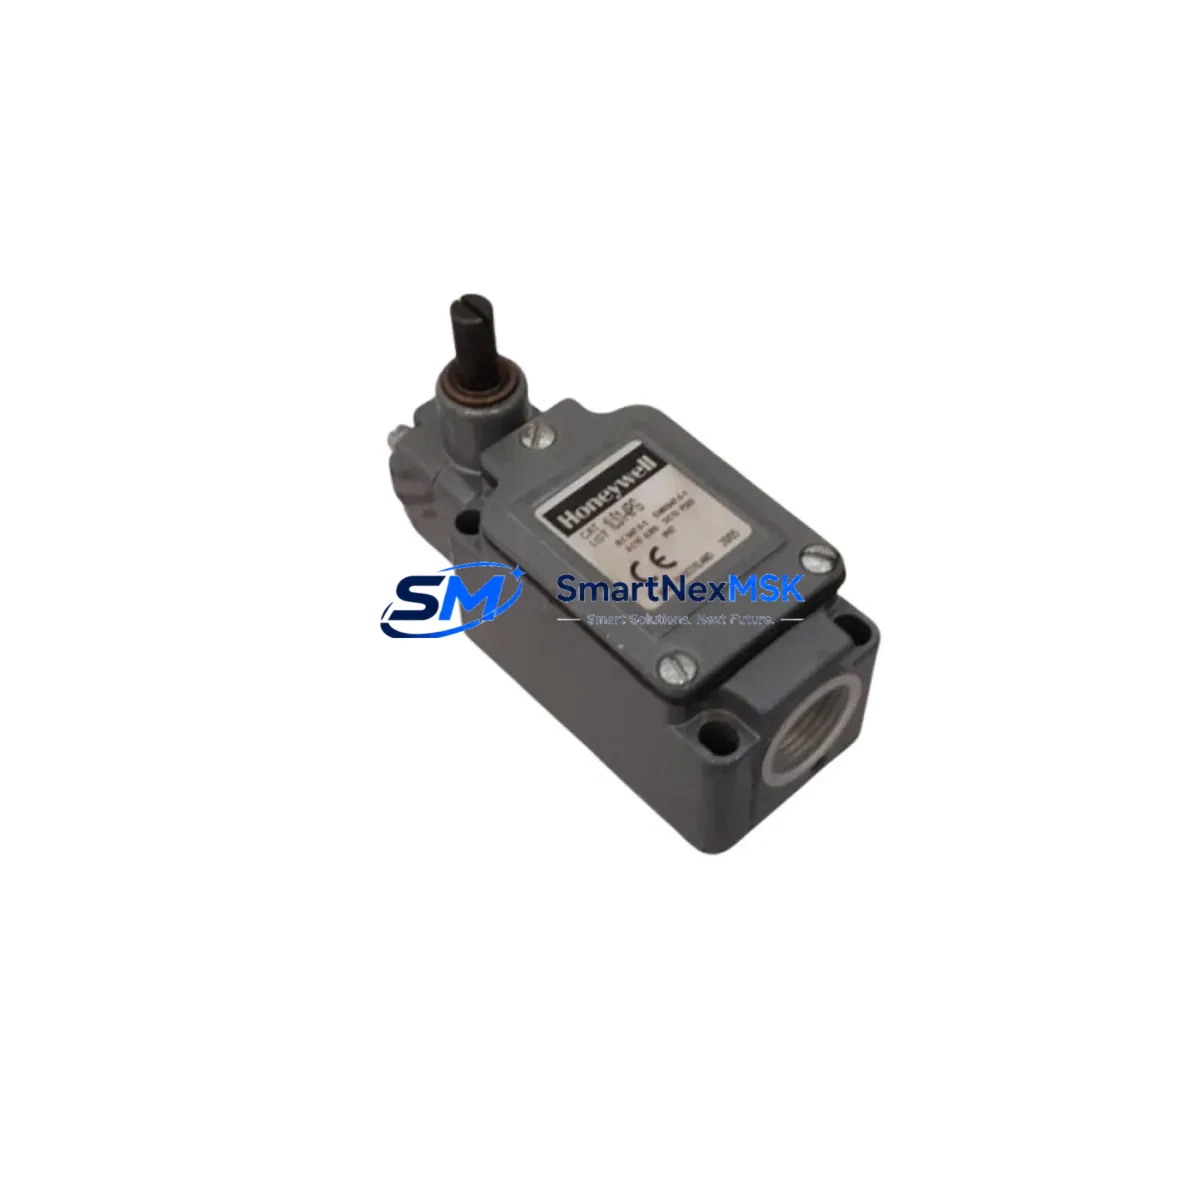
Honeywell 1LS1-4PG Maintenance-Ready Spare for 1LS Automation
The Honeywell 1LS1-4PG is a heavy-duty industrial limit switch from the MICRO SWITCH 1LS Series, engineered for reliable position detection and machine safety interlock applications across demanding industrial environments. For maintenance engineers managing aging control systems, conveyor lines, press machinery, or automated assembly equipment, keeping a verified spare of the 1LS1-4PG on the shelf is a fundamental element of any downtime-reduction strategy. Unplanned limit switch failures are among the most common causes of unexpected machine stoppages — and with the 1LS1-4PG, fast site replacement is achievable without system reconfiguration or wiring modification.
From a procurement standpoint, the 1LS1-4PG occupies a critical position in the spare parts bill of materials for any facility running Honeywell MICRO SWITCH-based safety and position feedback circuits. Its robust die-cast housing, positive-opening contacts, and standardized conduit entry make it a direct drop-in replacement for worn or damaged units in the field. Each unit supplied by SMARTNEXMSK is sourced from verified channels, functionally tested prior to dispatch, and covered by a 12-month warranty — ensuring your maintenance team receives a part that is ready to install, not just ready to ship.
Spare Maintenance Table
| Parameter | Specification |
|---|---|
| SKU / Part Number | 1LS1-4PG |
| Brand | Honeywell / MICRO SWITCH |
| Series | 1LS Heavy-Duty Limit Switch Series |
| Product Type | Industrial Limit Switch |
| Contact Configuration | 1NO + 1NC (SPDT) |
| Actuator Type | Roller Plunger (Top) |
| Operating Force | Per Honeywell 1LS Series datasheet |
| Voltage Rating (AC) | Up to 600V AC |
| Current Rating | Up to 10A (resistive load) |
| Enclosure Rating | NEMA 1, 2, 3, 4, 6, 12, 13 / IP67 |
| Housing Material | Die-cast zinc alloy |
| Conduit Entry | 3/4-14 NPT (side entry) |
| Operating Temperature | -40°C to +121°C |
| Compatibility | Direct replacement for Honeywell 1LS Series; compatible with standard 1LS mounting footprint |
| Application Environment | Conveyor systems, press machinery, packaging lines, automated assembly, safety interlocks |
| Maintenance Recommendation | Inspect actuator travel, contact resistance, and conduit seal integrity every 6 months or per PM schedule |
| Origin | United States |
| Warranty | 12 Months — functional test certificate available on request |
Maintenance Planning for Continuous Operation
When scheduling a replacement of the 1LS1-4PG during planned maintenance or responding to an unplanned fault, maintenance engineers should treat the limit switch as part of a broader electrical circuit inspection — not an isolated component swap. Begin by verifying the integrity of the conduit wiring and terminal connections feeding the switch. Loose or corroded terminals at the junction box or control panel terminal strip are a frequent secondary cause of limit switch circuit faults and should be re-torqued and inspected for oxidation during every replacement event.
The 24VDC or 120VAC control power supply feeding the limit switch circuit should be checked for voltage stability and ripple, particularly in older panels where the power supply module may be approaching end of life. If the 1LS1-4PG is wired into a safety relay module — such as a Honeywell or Pilz safety relay — verify that the relay’s input channel is responding correctly after the new switch is installed, and confirm that the safety relay’s self-monitoring function has not latched a fault condition.
For systems where the 1LS1-4PG feeds a discrete input channel on a PLC or DCS I/O module, confirm that the input card is reading the correct logic state after replacement. In Honeywell DCS environments, this may involve checking the associated FTA (Field Termination Assembly) for signal continuity. In Siemens or Allen-Bradley PLC panels, verify the corresponding digital input module channel status in the diagnostic display. If the system uses signal isolators between the field device and the I/O card, inspect the isolator for correct output signal level — a degraded isolator can mask a healthy switch and generate nuisance faults.
Where the 1LS1-4PG is used as a machine guard interlock, also inspect the associated safety circuit fusing, the interlock wiring harness, and any downstream contactors or motor protection relays that respond to the switch signal. Maintaining a small buffer stock of 1LS Series companion components — including the 1LS1-2 (standard plunger variant), 1LS1-8 (wobble stick actuator), and 1LS3 (side rotary actuator) — alongside the 1LS1-4PG ensures that your maintenance team can address actuator-type mismatches during emergency replacements without waiting for additional procurement cycles. Pairing this with a stock of appropriate conduit fittings, terminal ferrules, and DIN rail terminal blocks further reduces mean time to repair.
Site Replacement Workflow
Step 1 — Isolation & Lockout/Tagout: De-energize the machine circuit and apply LOTO procedure. Confirm zero energy state at the limit switch conduit entry using a calibrated voltage tester.
Step 2 — Document Existing Wiring: Photograph or sketch the existing terminal connections (NC, NO, COM) before disconnecting. The 1LS1-4PG uses a standard SPDT configuration — confirm terminal labeling matches your panel drawing before proceeding.
Step 3 — Remove Faulty Unit: Loosen the conduit locknut, disconnect wiring at the switch terminals, and remove the four mounting screws. Retain the mounting hardware if reusable.
Step 4 — Inspect Mounting Surface & Actuator Alignment: Check the mounting surface for corrosion or deformation. Verify that the actuator travel path is clear and that the cam or dog actuating the switch is undamaged and correctly positioned.
Step 5 — Install 1LS1-4PG Spare: Mount the new unit, reconnect wiring per the documented terminal layout, and re-seal the conduit entry. Torque mounting screws to specification.
Step 6 — Functional Verification: Re-energize the circuit and manually actuate the switch through its full travel range. Confirm correct logic state change at the PLC input or safety relay. Log the replacement in the maintenance record with date, technician ID, and new unit serial number.
This workflow supports direct replacement of legacy 1LS Series units without requiring panel drawing revisions or PLC program changes, minimizing total downtime to under 30 minutes for a prepared maintenance team.
Spare Parts Support FAQ
Q1: Is the 1LS1-4PG a direct replacement for older Honeywell MICRO SWITCH 1LS Series units?
Yes. The 1LS1-4PG maintains the standard 1LS Series mounting footprint and terminal configuration, making it a direct mechanical and electrical replacement for worn or obsolete units of the same series. No wiring or mounting modifications are required in most standard installations.
Q2: How is the 1LS1-4PG tested before shipment?
Each unit undergoes functional contact continuity testing and actuator travel verification prior to dispatch. A test certificate is available on request. Units are individually packaged to prevent transit damage.
Q3: What is the warranty coverage and how are claims handled?
All 1LS1-4PG units supplied by SMARTNEXMSK carry a 12-month warranty from the date of shipment, covering manufacturing defects and functional failures under normal operating conditions. Warranty claims are processed via email with photographic evidence and a brief fault description — replacement units are dispatched promptly upon claim approval.
Q4: Can SMARTNEXMSK support long-term or blanket order supply for the 1LS1-4PG?
Yes. For facilities managing multiple machines or planning scheduled overhauls, SMARTNEXMSK supports blanket purchase orders and reserved stock arrangements for the 1LS1-4PG and related 1LS Series components. Contact our sales team to discuss volume pricing and lead time commitments.
© 2026 SMARTNEXMSK. All rights reserved.
Original Source: https://smartnexmsk.com
Contact: [email protected] | +86 18259474341